Showing posts with label Mending and Sewing Repairs. Show all posts

Wednesday, November 20, 2013

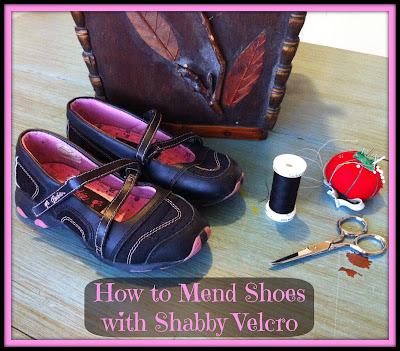
How to Fix Shoes with Shabby Velcro


Over the summer, my sister-in-law gave us a bag of clothes and shoes for Little Gal.  It was very sweet of her, and full of beautiful things.  Her youngest daughter had grown out of the items, and she wanted to pass them on to us.  

There were ballet shoes, some fancy velvet shoes (I'm thinking Christmas), and these adorable black Mary-Jane shoes.  Little Gal really needed some black shoes for church, so I was thinking these would be perfect.  I got her dressed for church one day and as we were walking out the door, she told me the shoes wouldn't stay on because the velcro kept coming undone.  After watching her, it was totally true.  Bummer!  Quick wardrobe change and we were out the door.

I knew we either needed to buy new shoes, or fix these ones.  Like many things, I let it simmer until I came up with a possible solution.  I fixed them the way I'm about to explain, however, you really do have a second option if this one doesn't work for you.  I'll explain that second option, I just don't have pictures to illustrate it as I didn't need to use it.

Let's get started!

SUPPLIES:

Needle
Thread in complimentary color
Needle Nose Pliers
Thimble


Examine your shoe.  See where the velcro matches up, and look for any places where you might be able to add elastic into the strap.  Try the shoe on your child (or whomever will be wearing it) while holding the strap tight and on the shoe, and see if they can slip the shoe on and off without needing more "give".  In our case, Little Gal could slip her foot on without needing extra or needing less.  I put the strap where I wanted it to hold it fast, then moved onto the next step.

IF YOUR SHOE DOES NOT GO ON AND OFF EASILY, never fear...yet!  If you're really determined to fix the shoes, you may be able to cut the strap at a discrete place, then stitch the straps to both sides of some elastic.

For example, if Little Gal's foot wouldn't have gone off and on, I would have cut the strap right where the strap is laced through that little buckle on the instep of the shoe.  I may have trimmed the strap a little if I needed give, but not necessarily MORE strap.  I would have then sewn the straps back onto a doubled-up piece of black (or complimentary color) elastic.  I would have threaded it back through the little buckle piece, then continued onto the next steps.


Thread your needle.  Since I wanted this to be heavy-duty, I used a double threaded needle instead of a single threaded needle.

Mark or remember where the strap is going to permanently end up.  Pull the strap off of the velcro, then stick the needle through the inside of the strap on the velcro side.  This way your knot will be hidden.

Once you've pulled the needle and thread through, replace the strap where you want it.


Begin stitching about a 1 inch line.  Take care to follow the stitching that the manufacturer sewed.  It will be easier.  Use that thimble and the needle nose pliers to help you.  These shoes were both leather and man-made on the top, and it was pretty rough at times.  It killed my needle.  


After you've stitched about an inch down the shoe, you'll need to stitch back up on the other side of the velcro unless you want to go all the way down the strap, stitch across, then stitch back up.  I didn't want to or feel it was necessary.

Cross over when working on the inside of the shoe, so that you can't see that huge stitch (I'm pointing to it with my pliers) on the outside.  

Continue up the shoe.  Do a couple of extra stitches if you're worried about durability.  Tie the knot on the inside so nobody can see it.


Can you see the stitches?  I can only see a hint of one when I'm looking at the shoe carefully in my hand.  Woohoo for saving some money and not wasting perfectly good (well, NOW perfectly good) shoes!

Have you mended shoes before?  Any tips?  I'm particularly interested in finding out if there's a better needle to be used for this sort of thing.  I just used a general use one.  I also have an awl that I could have used to make the needle holes, but didn't think of it at the time.

Friday, November 8, 2013

How To Fix Footie Pajamas


Little Gal has long, slender, feet, unlike footie pajamas have.  The combination of long and slender vs. short and wide creates holes!  Two years ago, I had a pile of about 8 pairs of footie pajamas that had holes in the toes where her little toes had rubbed and worn the fabric.  After making attempts at mending them with darning stitches, hole-sized patches, cutting the bottoms of the feet out and sewing new ones back in, I gave up and discarded the pajamas.  It drove me nuts throwing them away because they were still very usable and not worn out at all.  Except for those feet.

When one of my son's footie pajamas got holes in them a month ago, I left them in his closet instead of tossing them because I really wanted to figure this footie thing out.  When we updated our kids' room, I cleaned out their clothes and had to face these pajamas again.  As I looked at them, it hit me.  I didn't need to anything more than sew an inner lining of the bottom of the footie, stitched in around the seams.

I mended two feet (footies? ha!) of the pajamas in about 20 minutes, and even let Little Gal help with about 10 stitches.  He has been using them off and on for about a week now and they're working great!  No complaints from him, which is the real proof of success.  I discovered the holes one night when he begged me to change his pajamas because the feet were bothering him.

Disclaimers:  Yes, that is a nasty crack on my dried out thumb.  I've been using more lotion and my hands are getting better.  Handling all of the fabric with the costume-making at Halloween plus the change of weather has been rough on my already cursed skin.  I'm sorry you have to look at it!  My hand model wasn't in for the photo shoot  ;)  Also, that nail polish was an experiment with Little Gal that has been on for a LOOOOOOONG time.  It's still on.  In fact, I'll probably go take that off after I finish this post.  Or maybe not.  :) 

Ready to fix some Footies?  Here's what you'll need:


-Thread
-Scissors
-Needle
-Thimble (not necessary, but helpful when the layers of fabric get really thick)
-Fleece fabric (flannel might also work.  You want something thick)
-Chalk or some sort of washable marker if you feel so inclined.  I didn't take this step as this project is VERY forgiving.


Turn the pajamas inside out.  Lay the foot of the pajamas flat on a piece of fleece that you'd like to use.  I matched the fabric in my daughter's because I had time, but my son got crazy orange as it was the color I had out.

Once you've got the foot of the pajama flat, cut around the foot, taking care to not cut the pajama fabric.  If you prefer, you can use your chalk in this step to trace the foot of the pajama, and then cut it out.


Line the footie patch up with the foot of the pajama, and pin in place.  It'll be neater if you do.  It'll probably forgive you if you don't so long as you're a decent hand-sewer and you take care to continue lining it up.


Using a slip stitch, sew around the patch and foot of the pajamas.  To make a slip stitch, stick the needle through, pull until snug and make sure you don't get knots in your thread.  Make sure your stitches go through where the original stitches in the pajamas are.


Next, stick the needle through about 3/8" away from the first stitch, with the needle going through the fabric in the same way it did the first time. You do NOT sew needle down, then up when making a slip stitch.  It will be needle down, needle down, etc.  The thread will make little loops over the fabric edge, closing the seam off.


Once you've gone all the way around, tie the knot off.  If you really want to go for it, you could, at this point, stitch (by hand, or by machine, perhaps, if you can get the footie into the machine) over the places that have holes to connect the patch and the pajama fabric together.  I did not find this necessary, but you may need to do something like this if the hole is severe.  I think prevention is the key here, friends.  Do this as soon as you see a hole, or perhaps BEFORE you see a hole.

Here is a finished footie patch, slip-stitched all the way around.  It's in there well, and very comfortable for the Little Wearers.  I'm happy they're comfy and I'm happy I didn't have to get rid of perfectly good pajamas!

By the way, my daughter found a hole in her pajamas as I was writing this post, that's why there are two sets of jammies here!  I was able to take some more pictures of a couple of details I'd missed the first time.  Off to fix the other footie!

Do you mend footie pajamas?  How do you do it?